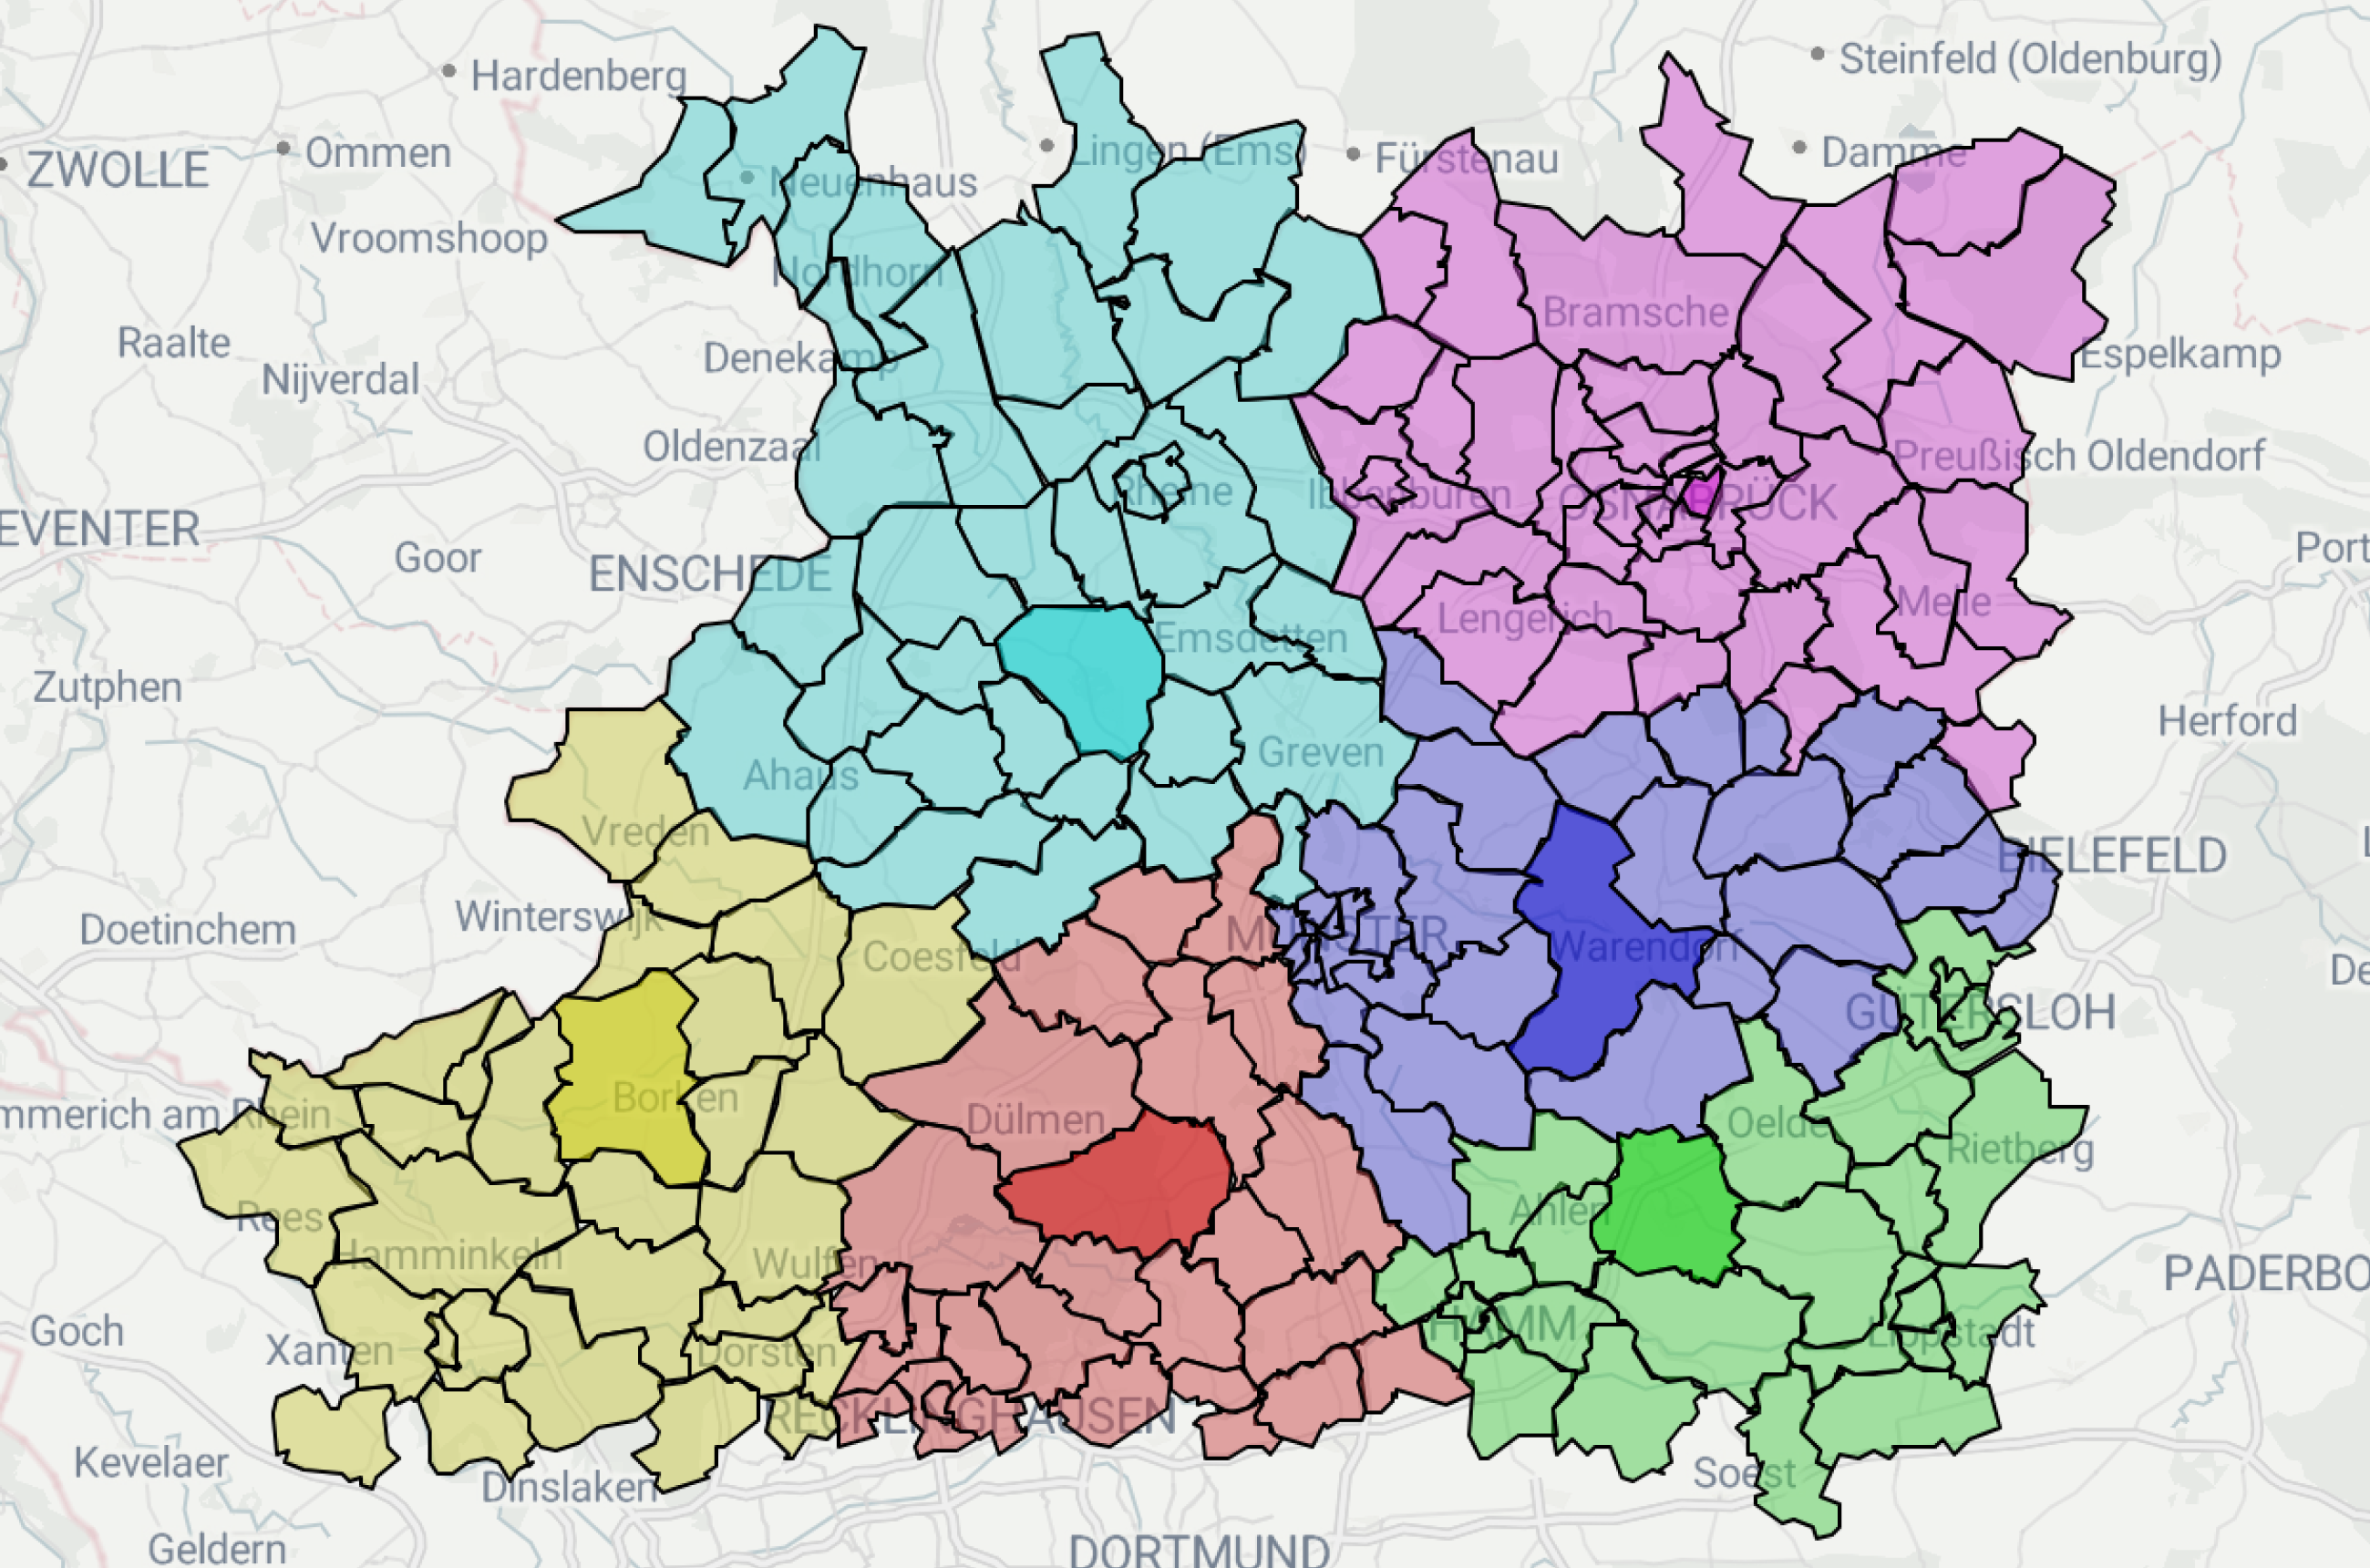
Which areas should local hospitals serve? Which delivery zones should be assigned to certain warehouses? The answers to these questions are found with region allocation models. Region allocation is an optimization problem used for assigning distribution centers, service centers, hospitals, retail locations, and more to specific regions based on demand, capacity, and other factors.
In this blog post, we’ll look at an OR-Tools region allocation model in Python. Given a set of regions with certain demands and a set of hubs with certain capacities, the goal is to assign each region to a hub such that the total demand of the regions assigned to a hub does not exceed the hub's capacity. The objective is to keep the regions as close to their assigned hub as possible.
If you’re building a model like this, you’ll want to share results with teammates and stakeholders, keep track of input data for easy access, and generally create a ledger of model runs to track model performance. In an earlier post, we covered how to track external model runs from a notebook. In this post, we’ll look at tracking model runs from a model written in a standard Python file. This process is also available as a video demo.
Tutorial: tracking external model runs from a Python file
We’re going to use an example from our community apps repo, but you can follow the same instructions and add the code in the steps below to track your own model’s runs.
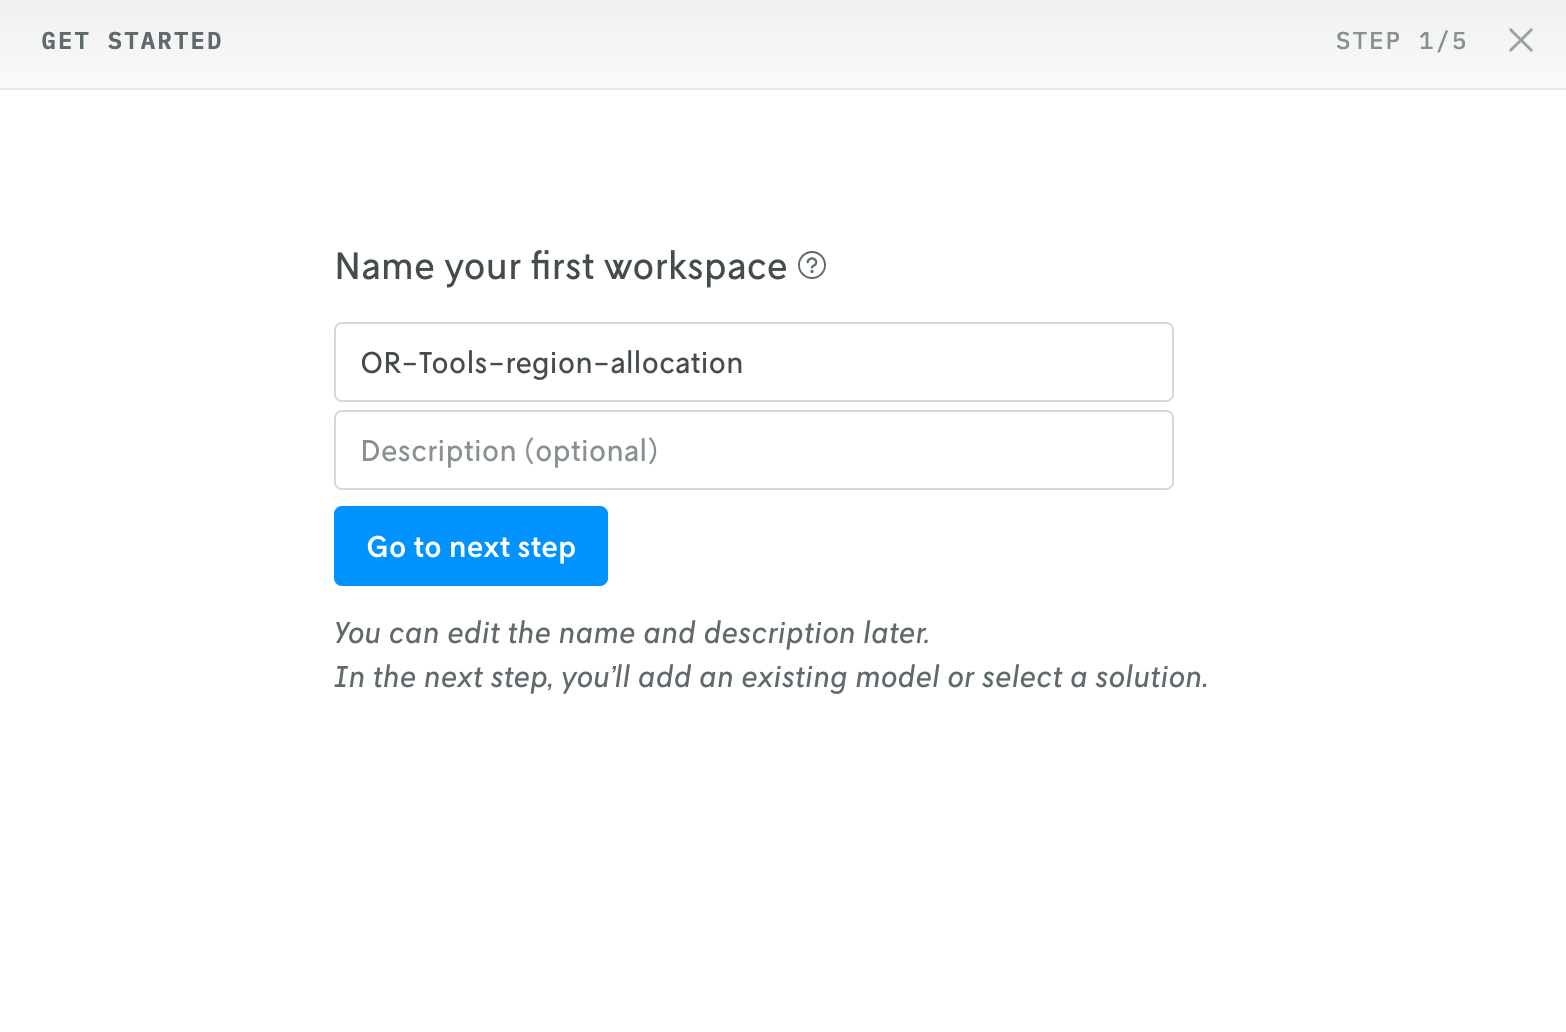
First, sign up for a free Nextmv account and follow the prompt to create and name your first workspace. Then, click “Go to next step.”
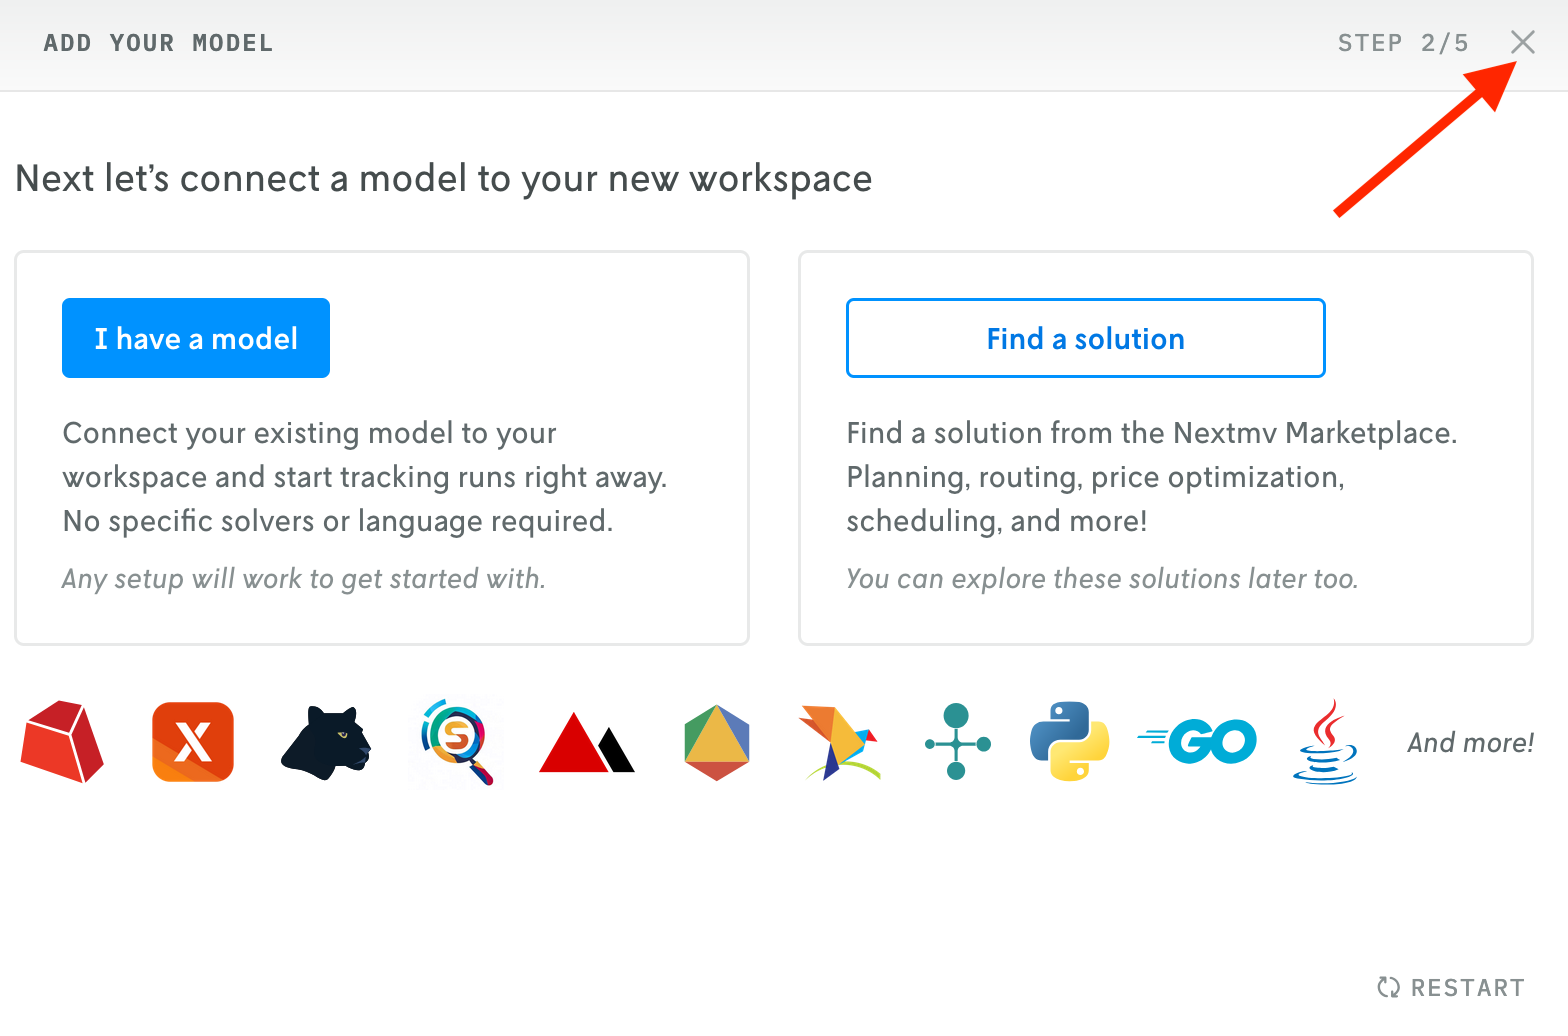
You can skip through the rest of the prompts by clicking the x in the top right of the prompt, as the tutorial in this post will walk you through a similar experience.
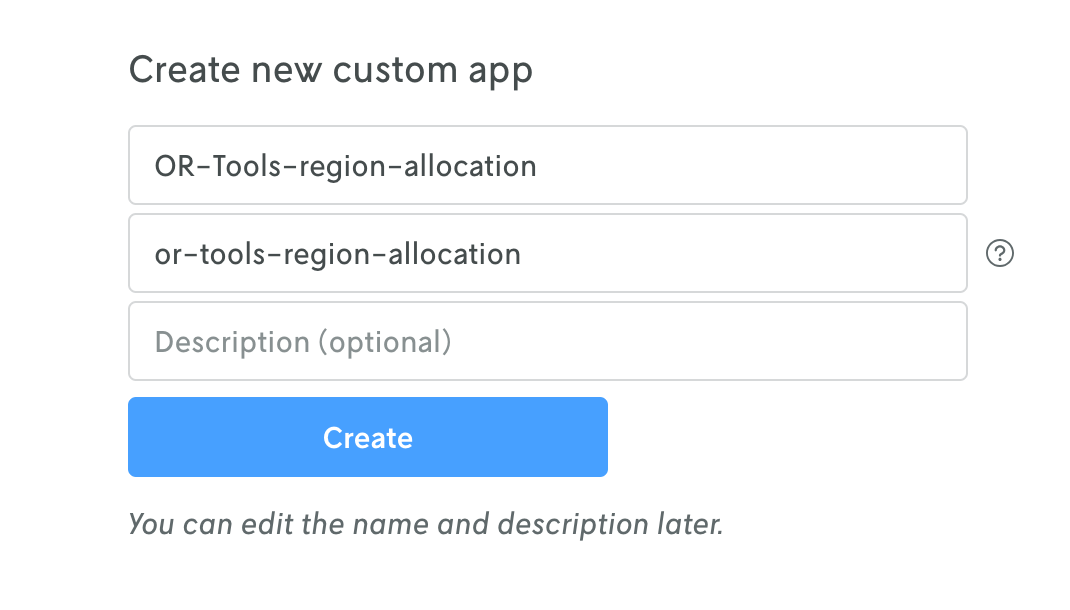
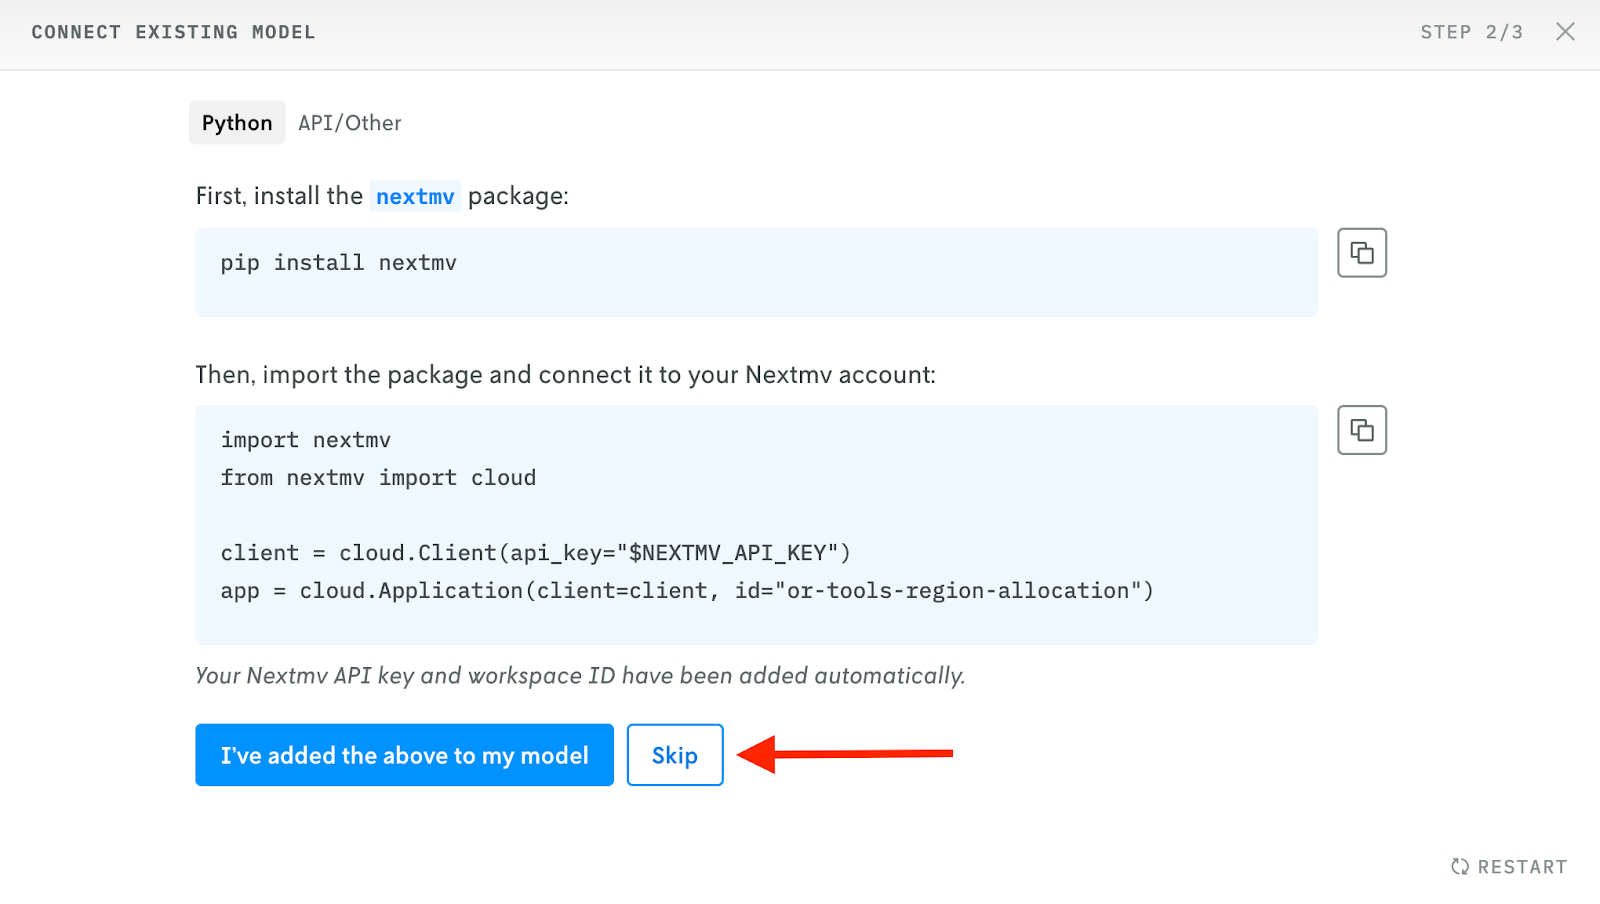
If you already have an account, log in and create a new custom app by going to “Apps & Workflows” and creating a “New custom app” in the upper right corner and naming your app.

After you’ve created the app, you can exit the prompt by clicking “Skip” at the bottom of the window.
Next, copy the files from this GitHub repo or use the following Nextmv CLI command. The folder includes a main.py (where the model code lives), input.json (sample input data for the model), and a requirements.txt.
nextmv community clone -a python-tr-ortools-region-allocationInstall the requirements from the text file.
pip3 install -r requirements.txtIn the Nextmv UI, find and copy your app ID.

Then find and copy your API key (Under Settings >> API Keys).
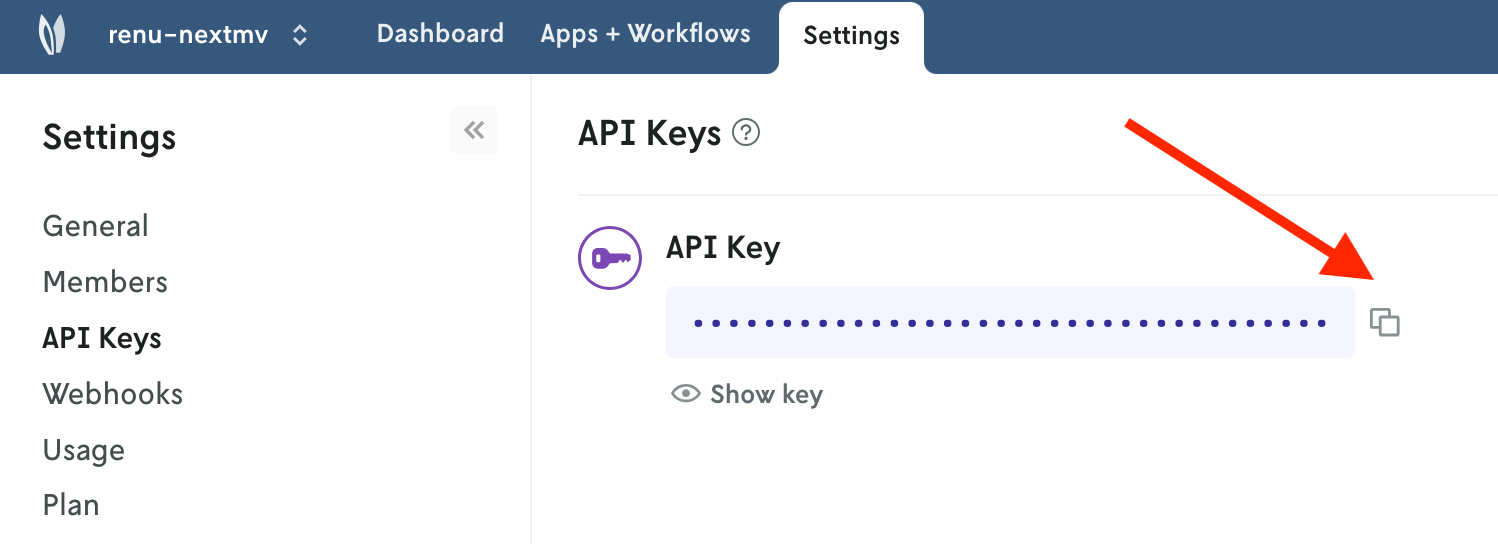
Export them to connect to your Nextmv account:
export NEXTMV_API_KEY=your_api_key
export NEXTMV_APP_ID=your_app_id
Open the main.py file. You won’t need to make any changes, but you’ll notice two sections that pertain to Nextmv. The rest is purely a Python OR-Tools model. These are the two pieces of code that you’ll add to your own model to track runs.
The first is importing Nextmv and Nextmv Cloud.
import nextmv
import nextmv.cloud
The second is the code that will send your run data to your Nextmv account.
# >>> POST TRACKED RUN TO NEXTMV PLATFORM
client = nextmv.cloud.Client(api_key=os.environ.get("NEXTMV_API_KEY"))
app = nextmv.cloud.Application(client=client, id=os.environ.get("NEXTMV_APP_ID"))
tracked_result = app.track_run_with_result(
	tracked_run=nextmv.cloud.TrackedRun(
		input=input_data,
		output=output_data,
		duration=nextmv.cloud.run_duration(
			start=before,
			end=time.time(),
		),
		status=nextmv.cloud.StatusV2.succeeded,
		error=None,
		logs="Hello Nextmv!",
	),
)
nextmv.log(f"Tracked run: {tracked_result.id}")
nextmv.log(f"Tracked run URL: {tracked_result.console_url}")
Now let’s run the Python file locally.
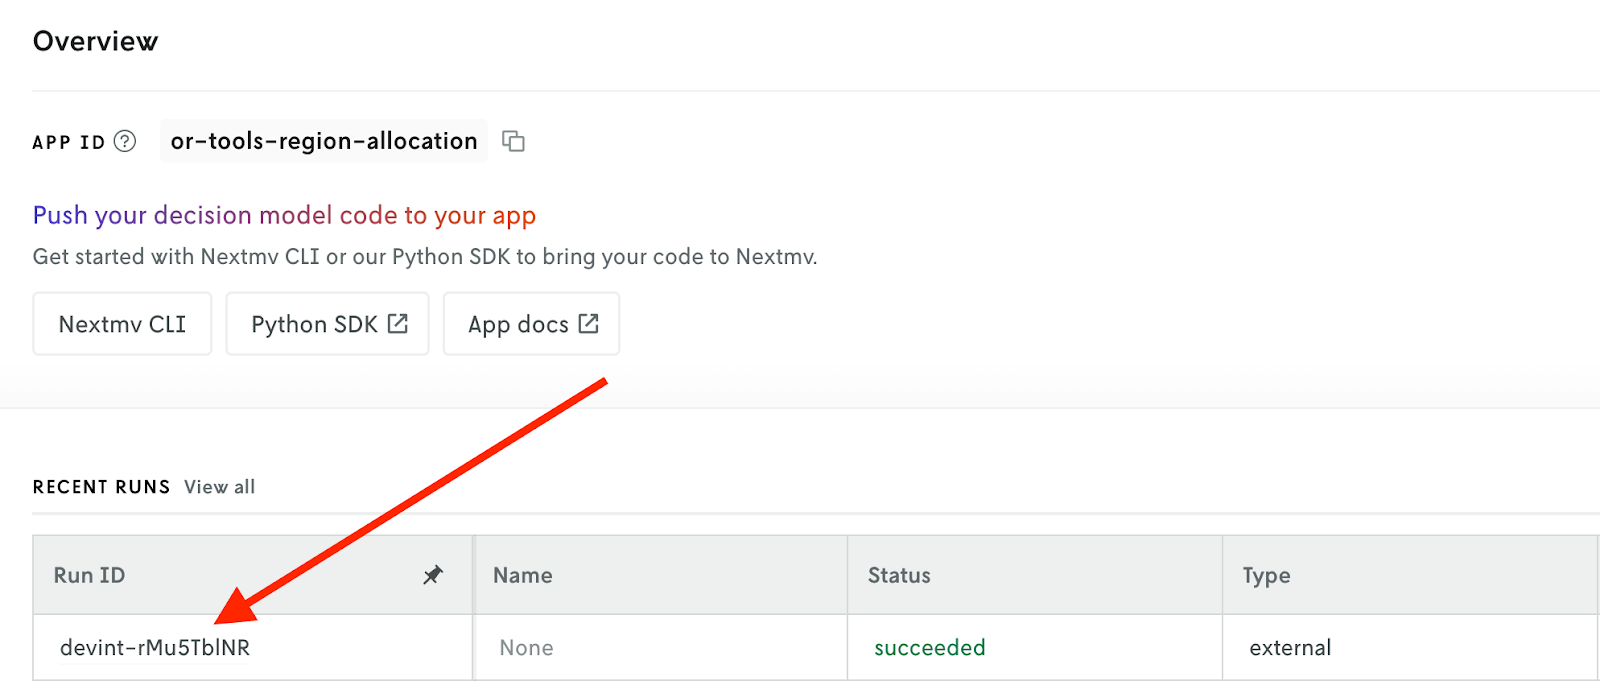
python3 main.py -input input.json -output output.jsonAn output will be returned that looks like this:
Tracked run: devint-rMu5TblNR
Tracked run URL: https://cloud.nextmv.io/app/or-tools-region-allocation/run/devint-rMu5TblNR?view=details
Success! You can now see the tracked run in the Nextmv UI! You can navigate to the link in the output, or open up your app in your Nextmv account, find “Recent Runs” and click on the new Run ID.
Once you click on the Run ID, you’ll see the run details with info such as date/time, duration, and status.
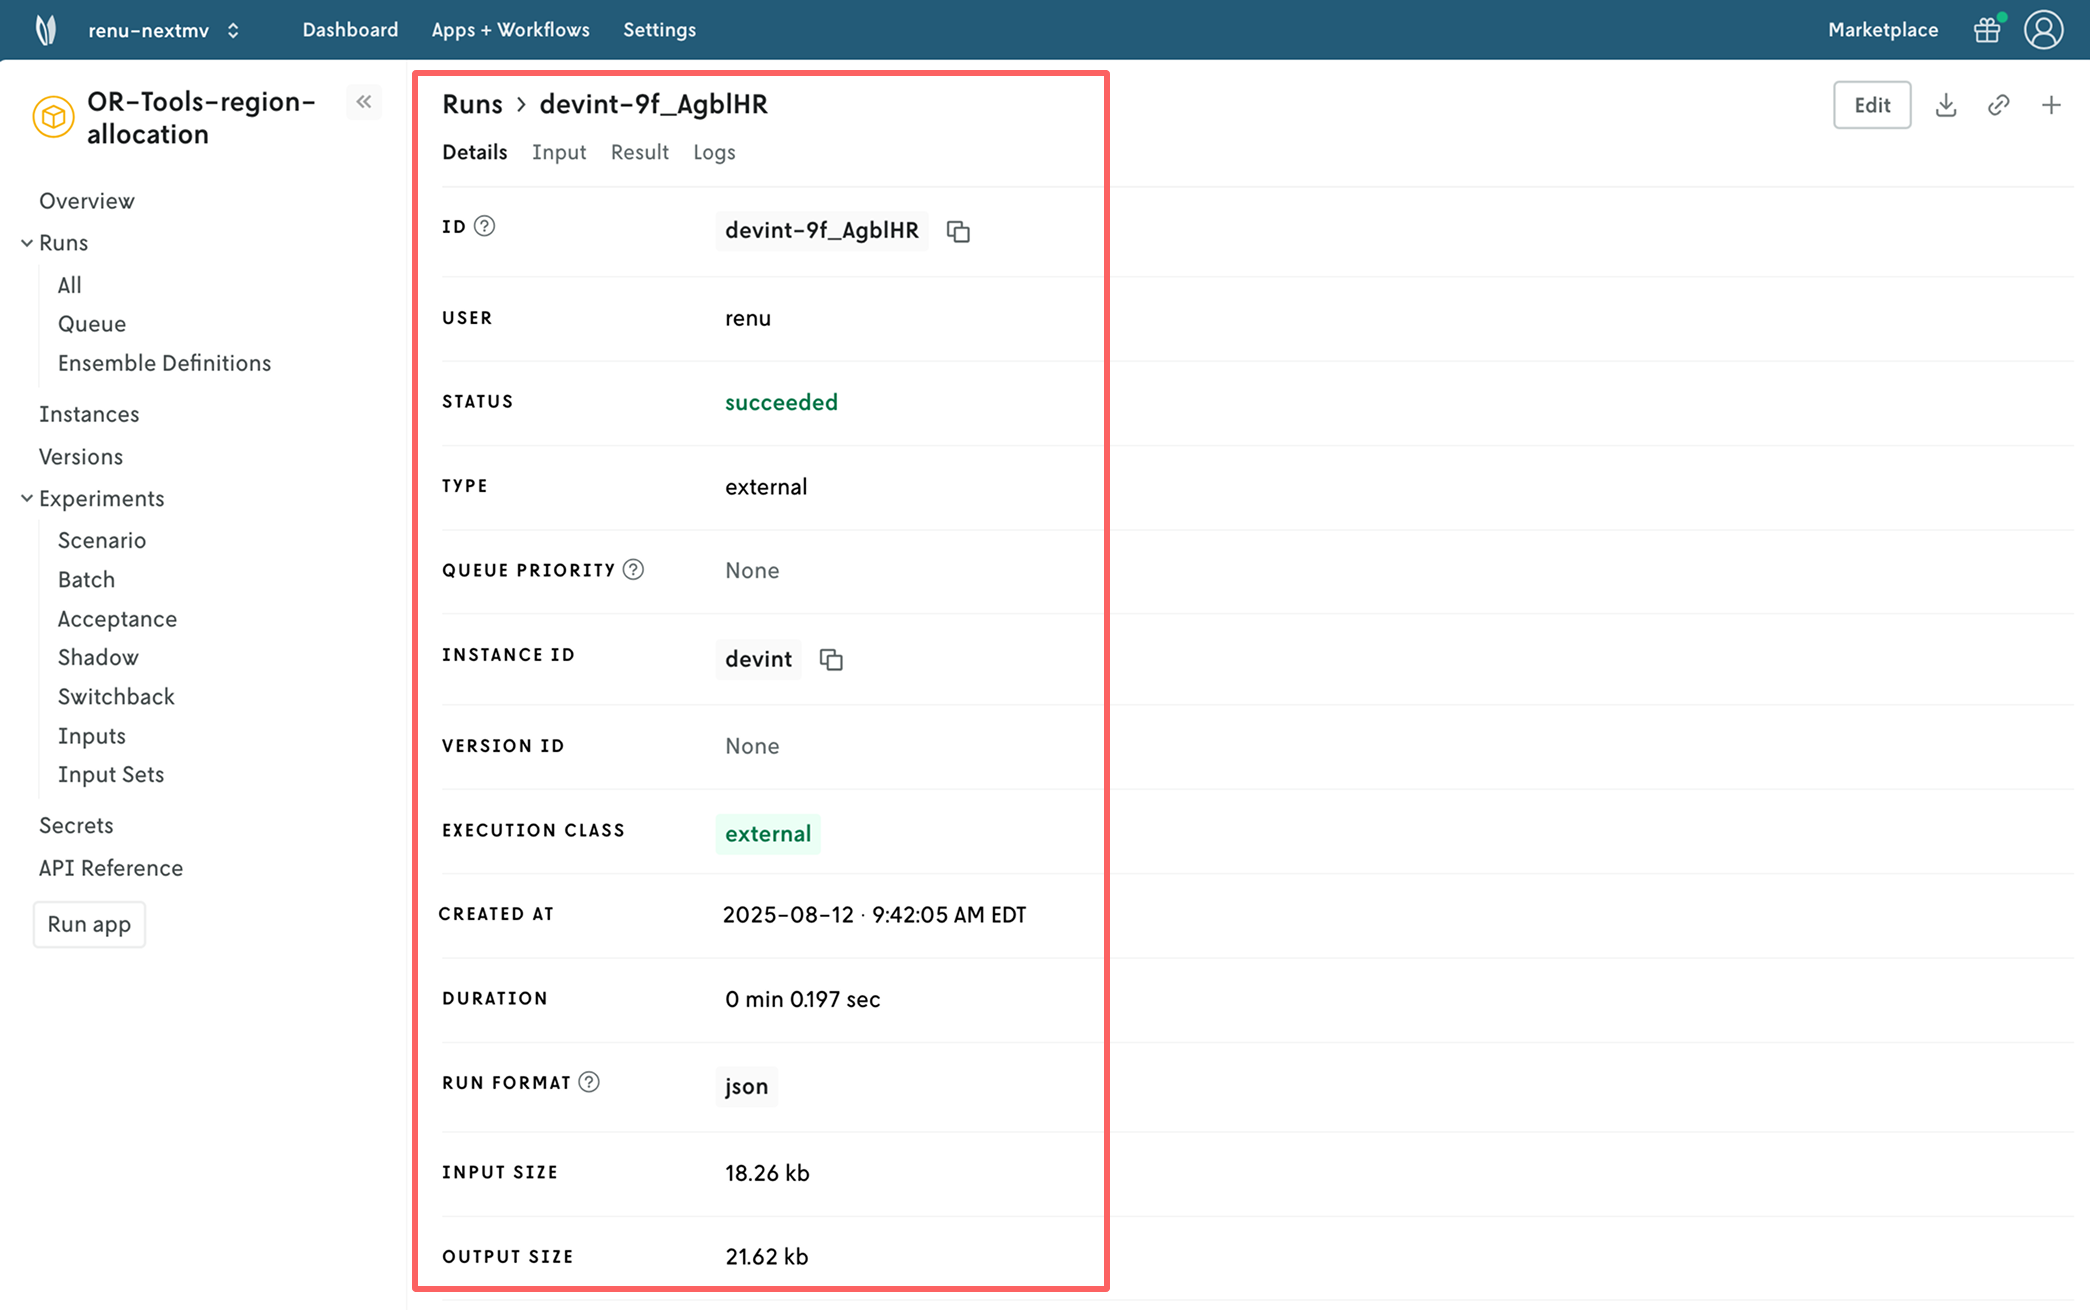
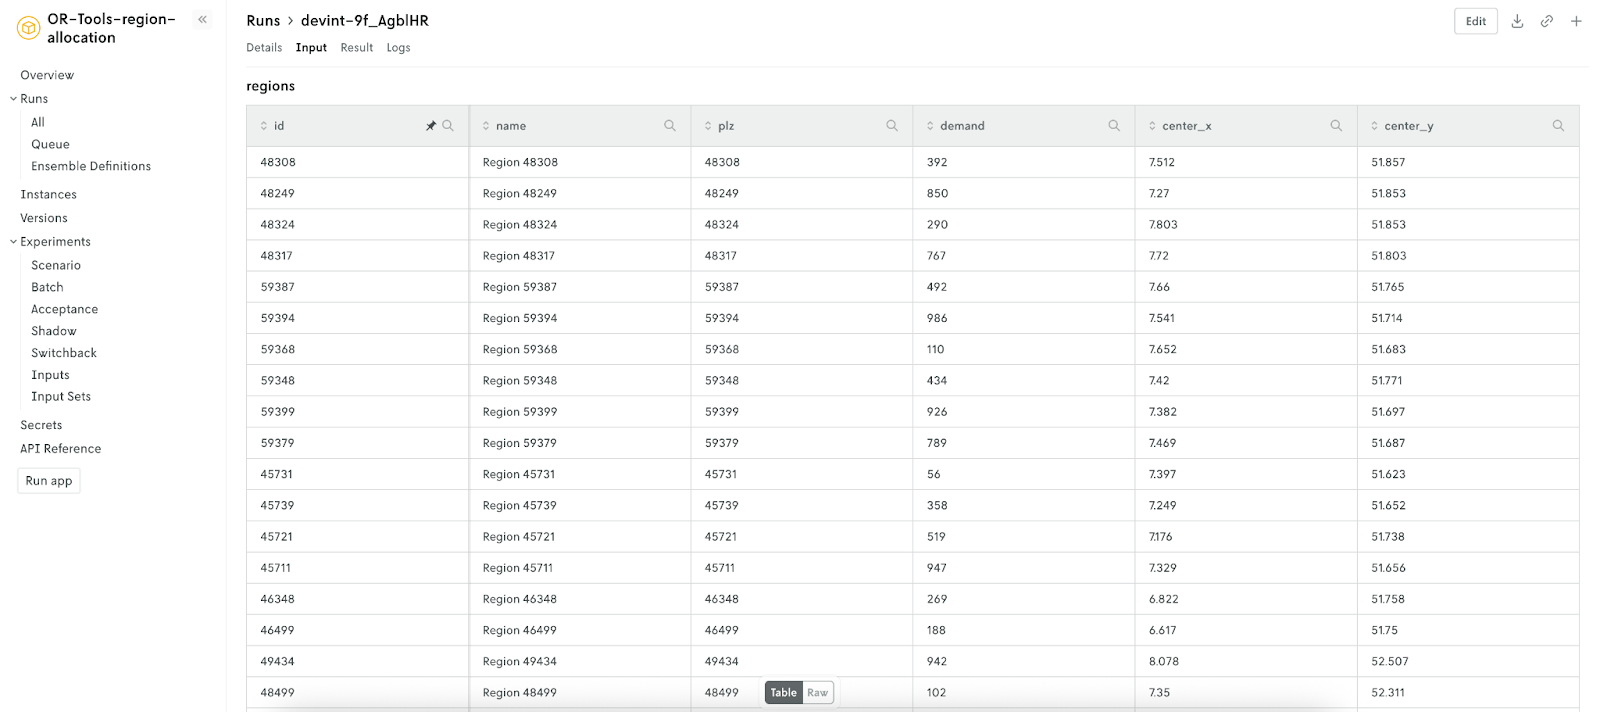
Next, you can select “Input” to see a table or raw view of the input data used for that run.
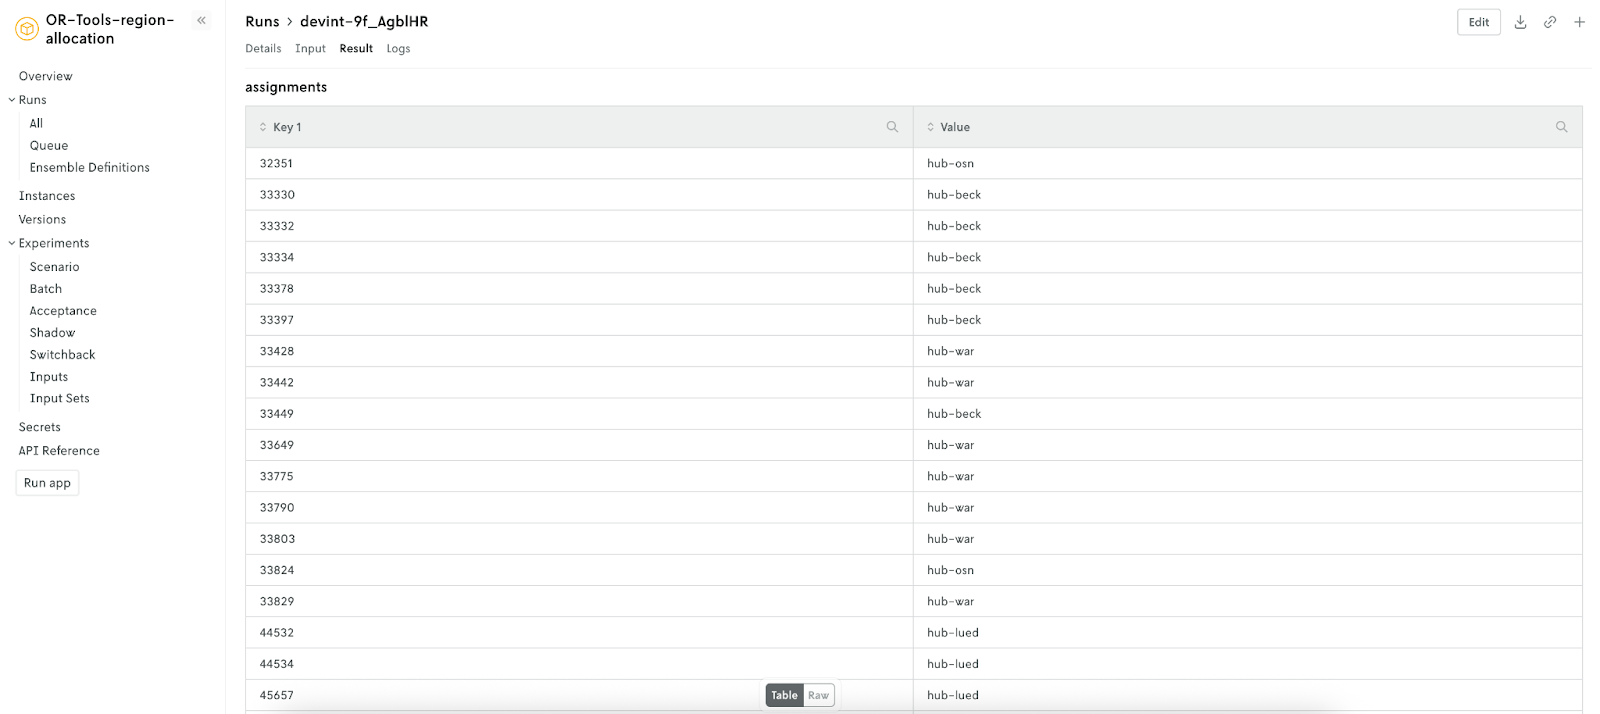
Clicking the “Result” tab will give you the option to review your plan in a table view or as a raw file. For this example, we can see the hub assignments.
Implementing a decision workflow with DecisionOps
Now that you’ve seen how to track external model runs in Nextmv, you can get even more out of the platform by pushing your model as an app to Nextmv: manage model versions, get increased observability, perform experiments like scenario tests, and collaborate with teammates.
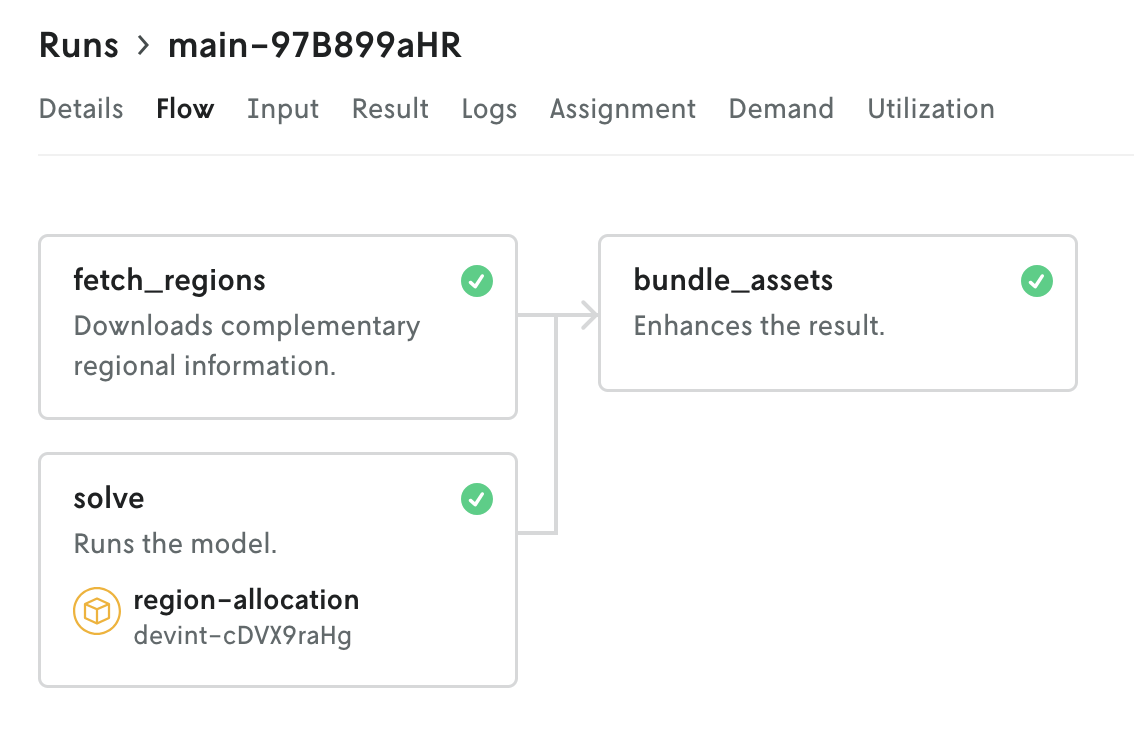
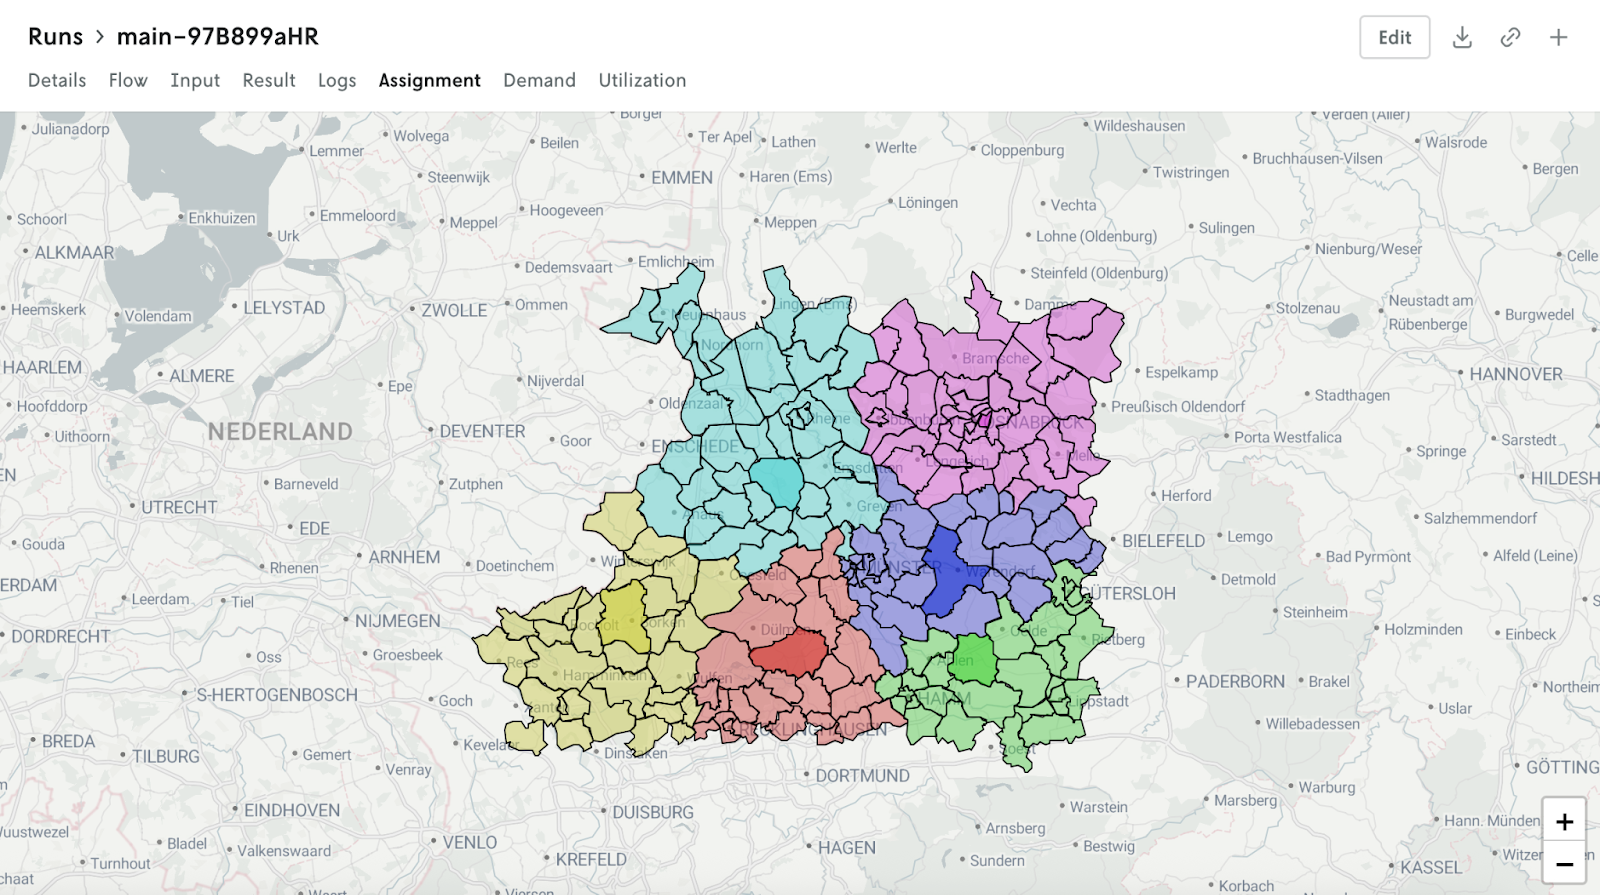
Below is an example decision workflow in Nextmv that includes data processing steps, running the model, and creating custom visualizations.
If you were reading along, but haven’t followed the steps yet, create a free Nextmv account, and please reach out to us with any questions you have!