

.png)
Are you working on multiple logistics models that use different modeling tools and solvers? Are you interested in linking them and understanding how these models impact each other? Do you want to run experiments on your models to confidently implement changes that improve your operations?
In this post, we’ll walk through three logistics models (demand forecasting, shift scheduling, and vehicle routing) for a hypothetical farm share business that delivers produce boxes from local farms to customers’ homes.
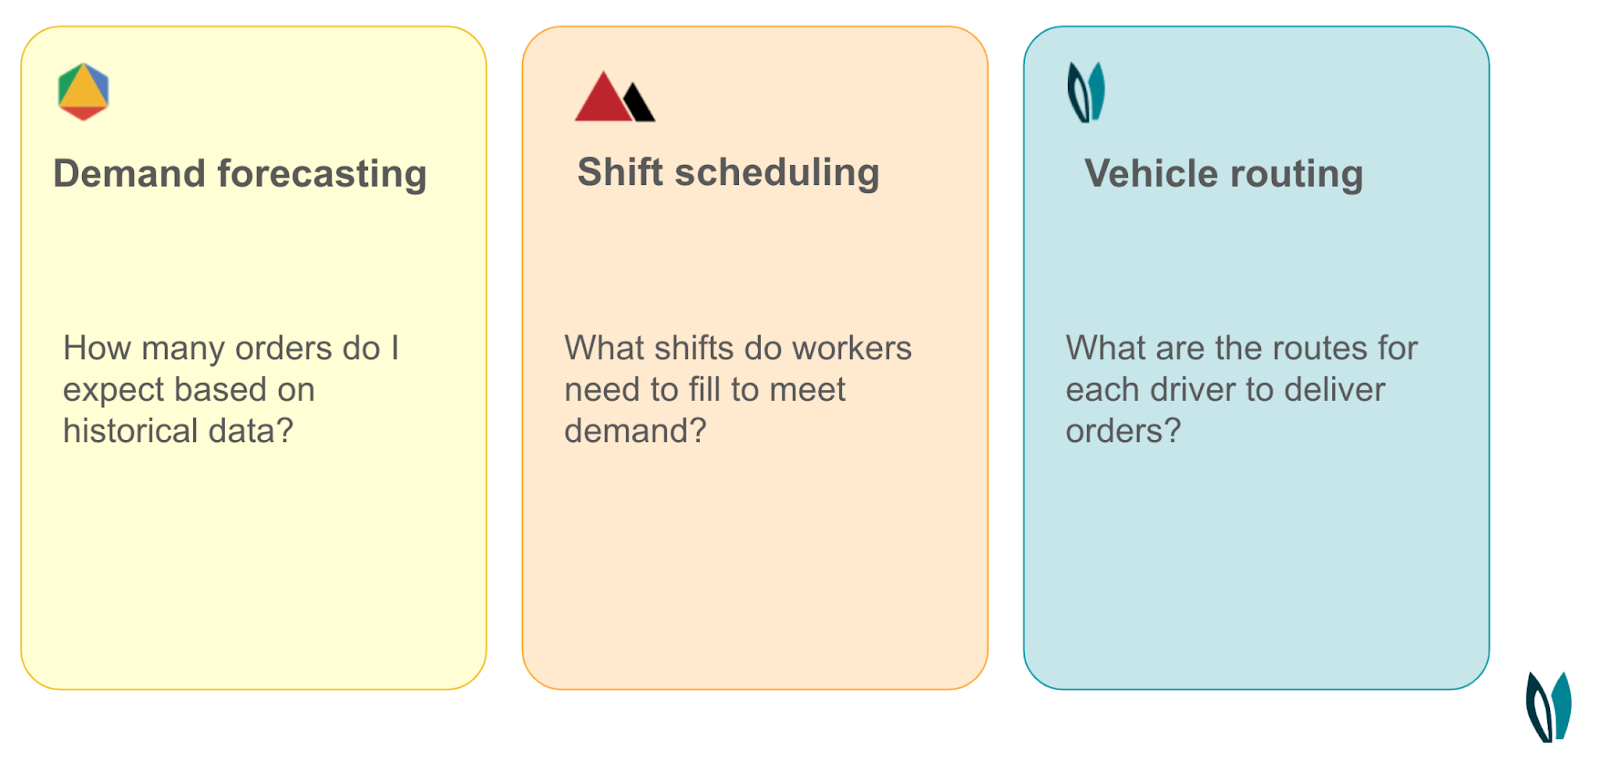
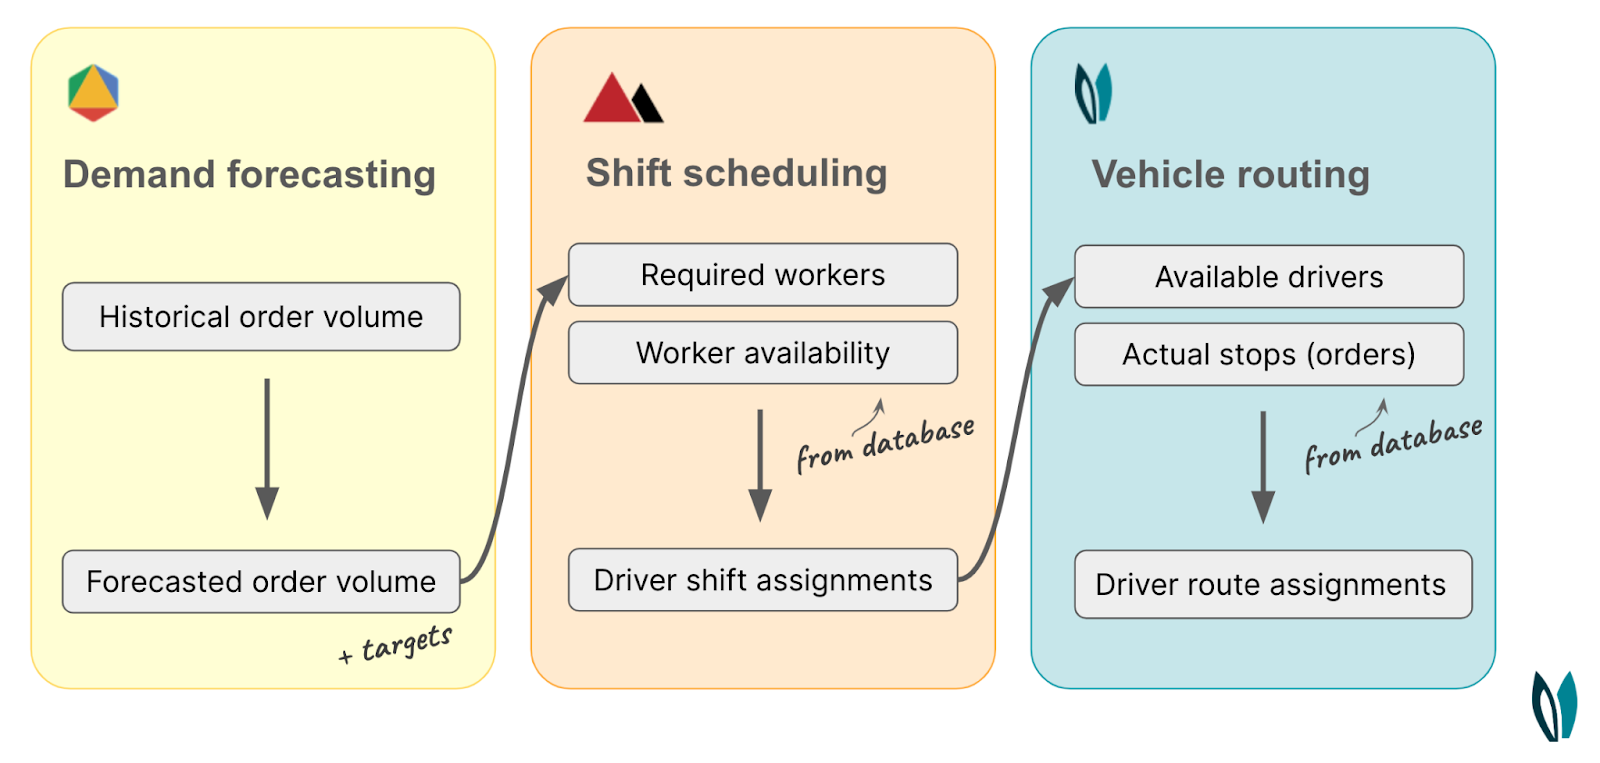
We’ll use the output of an OR-Tools-based demand forecasting app (forecasted order volume) plus targets as the input for the HiGHS shift scheduling app. Then we’ll use the output of the shift scheduling app (driver shift assignments) as the input for the Nextmv vehicle routing app. We’ll solve for route assignments that we’ll analyze using the experimentation tools in the Nextmv platform.
To get started, all you need to do is create a free Nextmv account and head to the Marketplace page.
Run the OR-Tools Demand Forecasting app
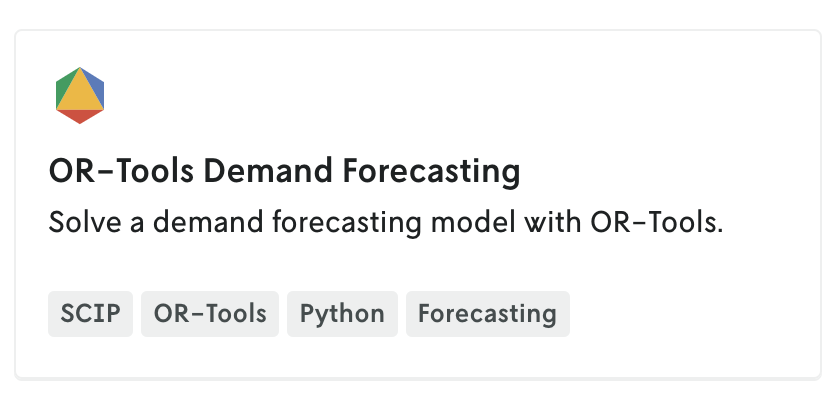
The OR-Tools Demand Forecasting app uses least absolute deviation (LAD) regression with historical demand data to create a demand forecast for the farm share company’s produce boxes
- Click ‘Clone app’
- Give the app a name (e.g., ‘My demand forecasting app’)
- Click ‘Run app’
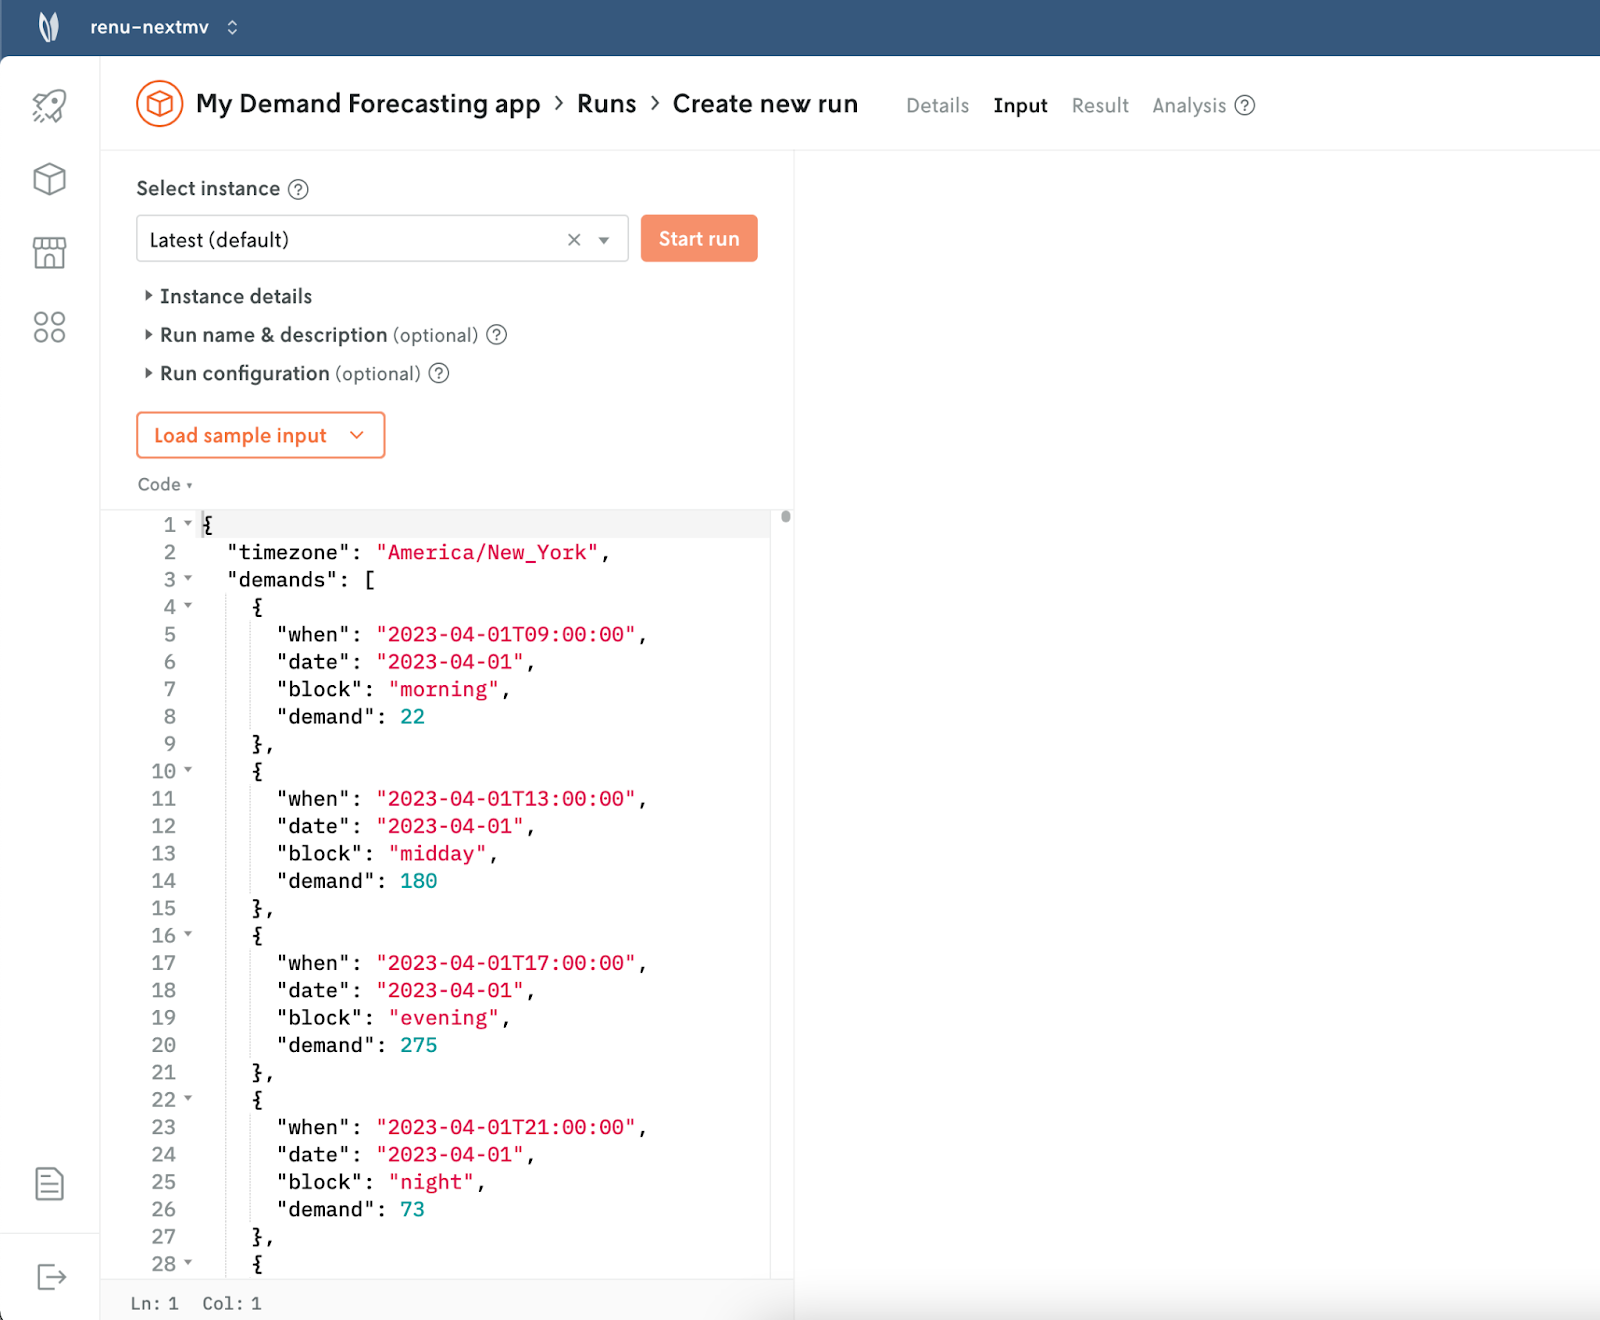
- Load sample input, ‘Demand (large)’
- Click ‘Start run’
The input data takes in timezone and demands (includes historical order volume).
The result is forecasted demand for the next 28 days.

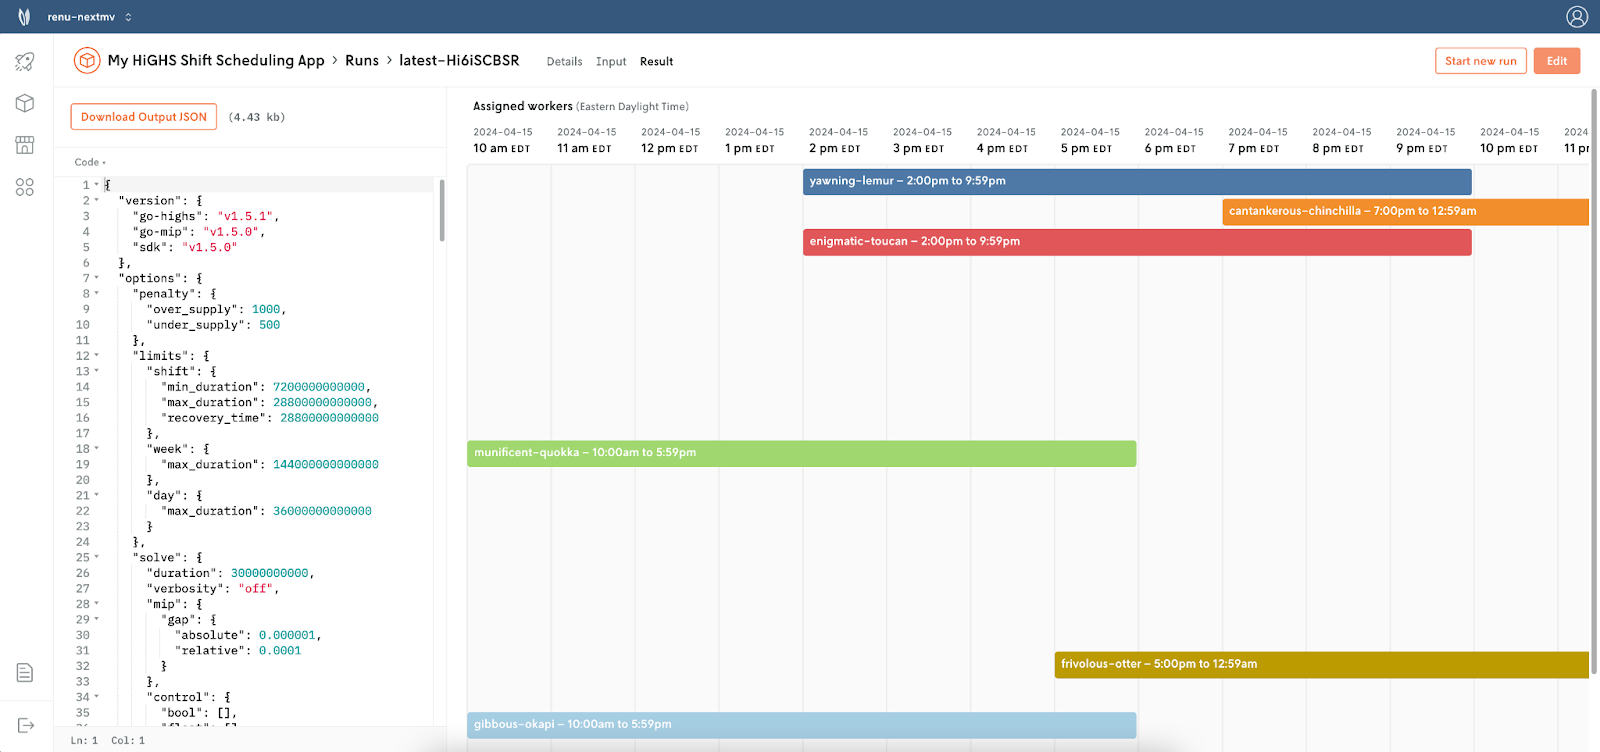
Run the HiGHS Shift Scheduling app

The goal of the HiGHS Shift Scheduling app is to schedule workers (in this case, drivers for the farm share business) to shifts based on forecasted demand.
- Click ‘Clone app’
- Give the app a name (e.g., ‘My shift scheduling app’)
- Click ‘Run app’
- Load sample input, ‘Large example’
- Click ‘Start run’
The input for the app is workers (available workers) and required workers (based on forecasted demand from the previous app).
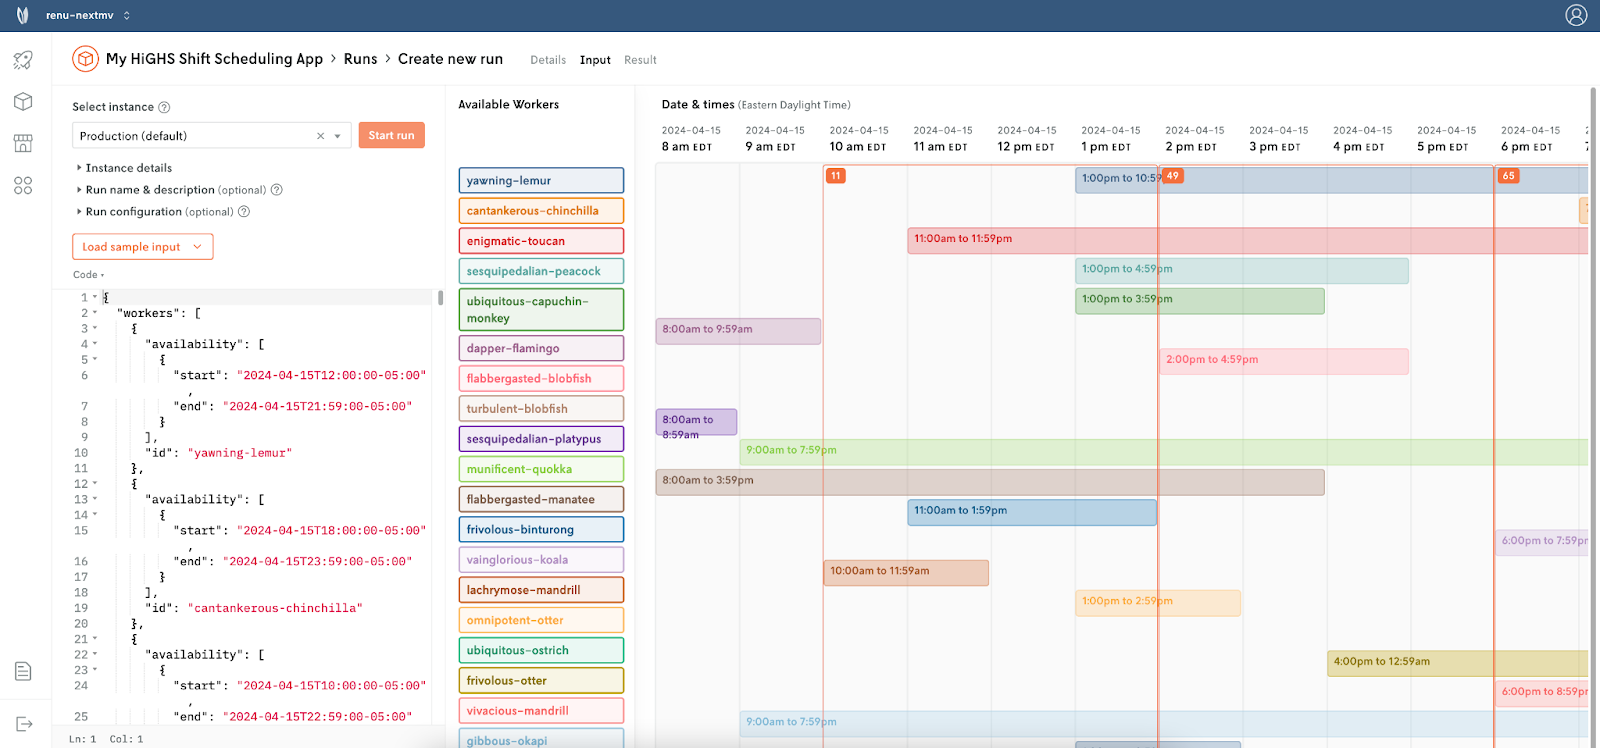
The result gives us the schedule: an array of assigned shifts (worker ID and timeframe).
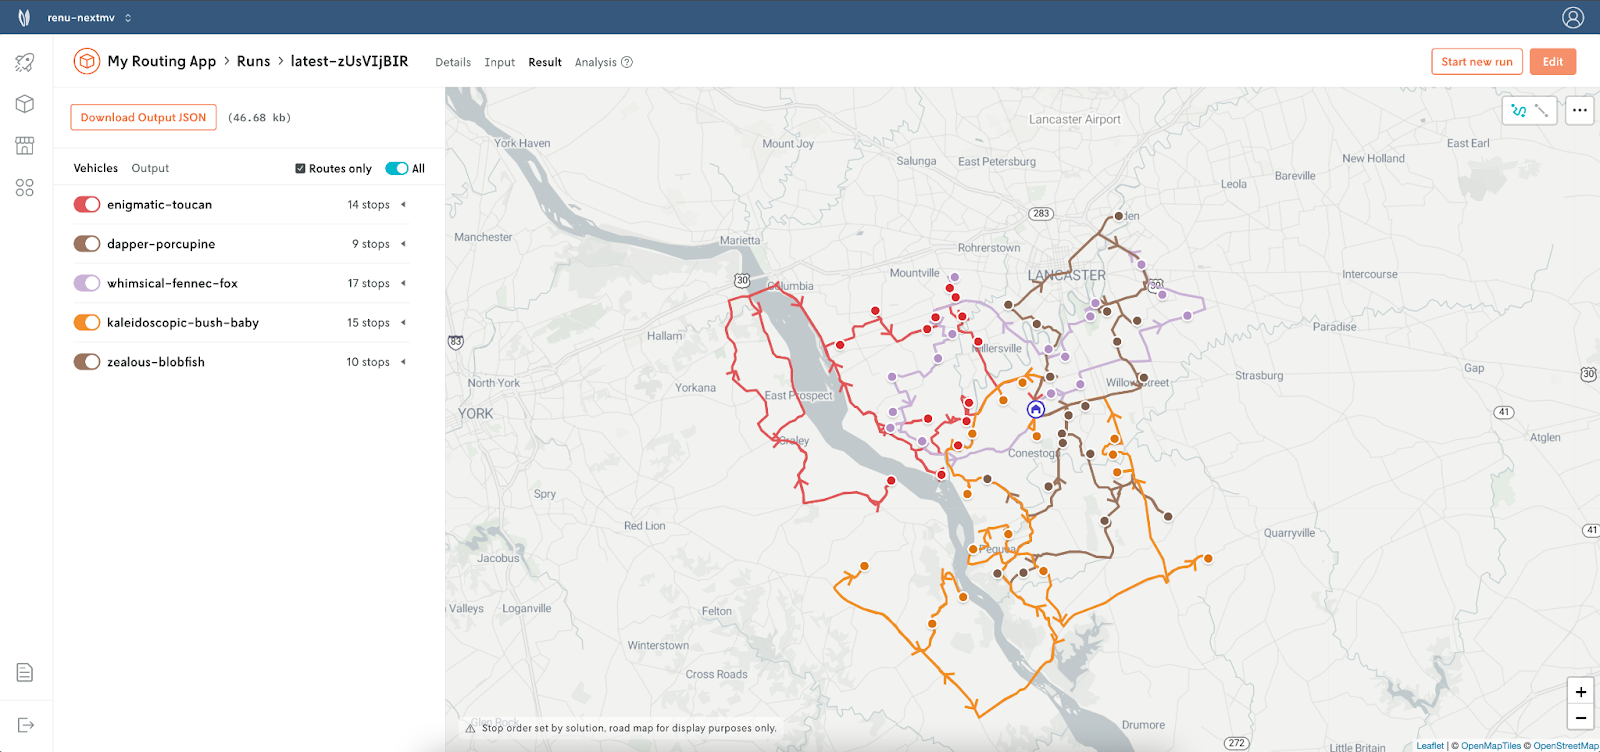
Run the Nextmv Vehicle Routing app
The goal of the Nextmv Routing app is to assign drivers (workers) to routes based on actual orders.
- Click ‘Clone app’
- Give the app a name (e.g., ‘My vehicle routing app’)
- Click ‘Run app’
- Load sample input, ‘Distribution Ex. Day 1’
- Click ‘Start run’
- Create two more runs using the sample inputs ‘Distribution Ex. Day 2’ and ‘Distribution Ex. Day 3’
Input is vehicles and stops (output from shift scheduling app).

The result is vehicle routes. We can see the workers (drivers) assigned and the routes on the map.
Create an experiment
We’ve now run our three logistics modes and we’ve linked them by using the output of one for the input of the next. However, at the farm share company, our operators are telling us that our drivers are unhappy because we’re scheduling them to shifts and then only a few are actually being assigned to routes. The drivers would also prefer to have routes localized to smaller clusters so they aren’t driving across town.
We think that by activating the cluster option (and penalizing routes that aren’t tightly clustered according to how big their radius is) we will create more desirable routes — and we will also add more drivers to the schedule to cover the additional routes. We want to test out this hypothesis using an acceptance test and historical run data. First, we’ll activate the cluster objective.
Create a new instance
- Open the routing app you created
- Create a new instance
- Give it a name (‘cluster activated’)
- Set the configuration option to model.objectives.cluster: 1
- Click ‘Create instance’

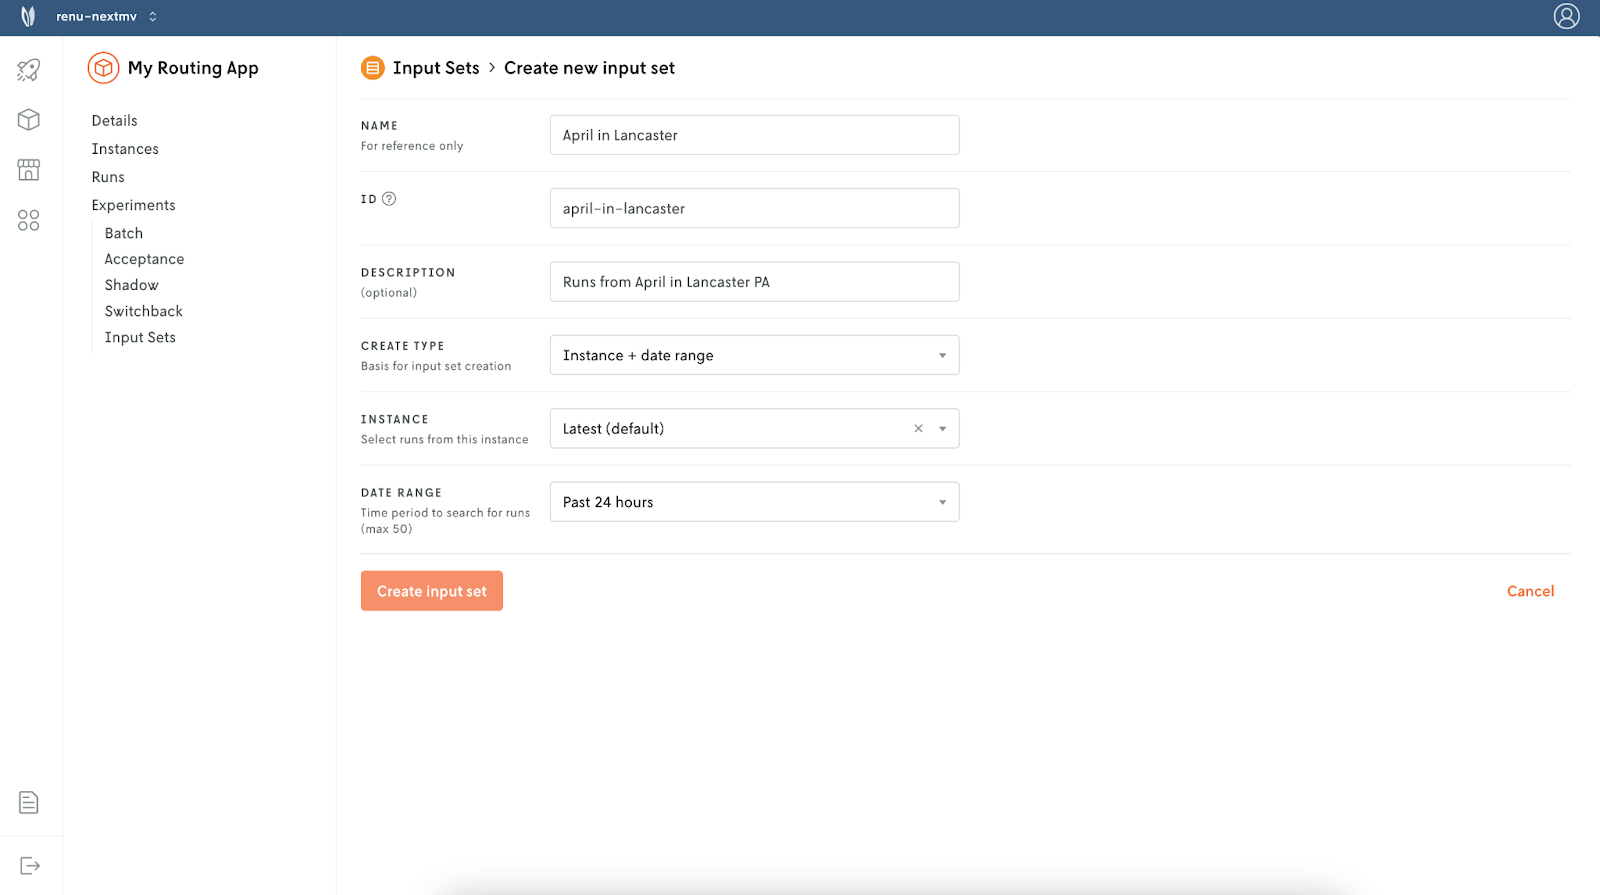
Create an input set
Next, we’ll group our latest runs together to use in the test by creating an input set.
- Open the routing app you created
- Click on ‘Experiments’ on the left-hand side
- Click on ‘Input sets’ and then ‘New input set’
- Give it a name (e.g., ‘April in Lancaster’)
- Select Date Range: ‘Past 24 hours’
- Click ‘Create input set’
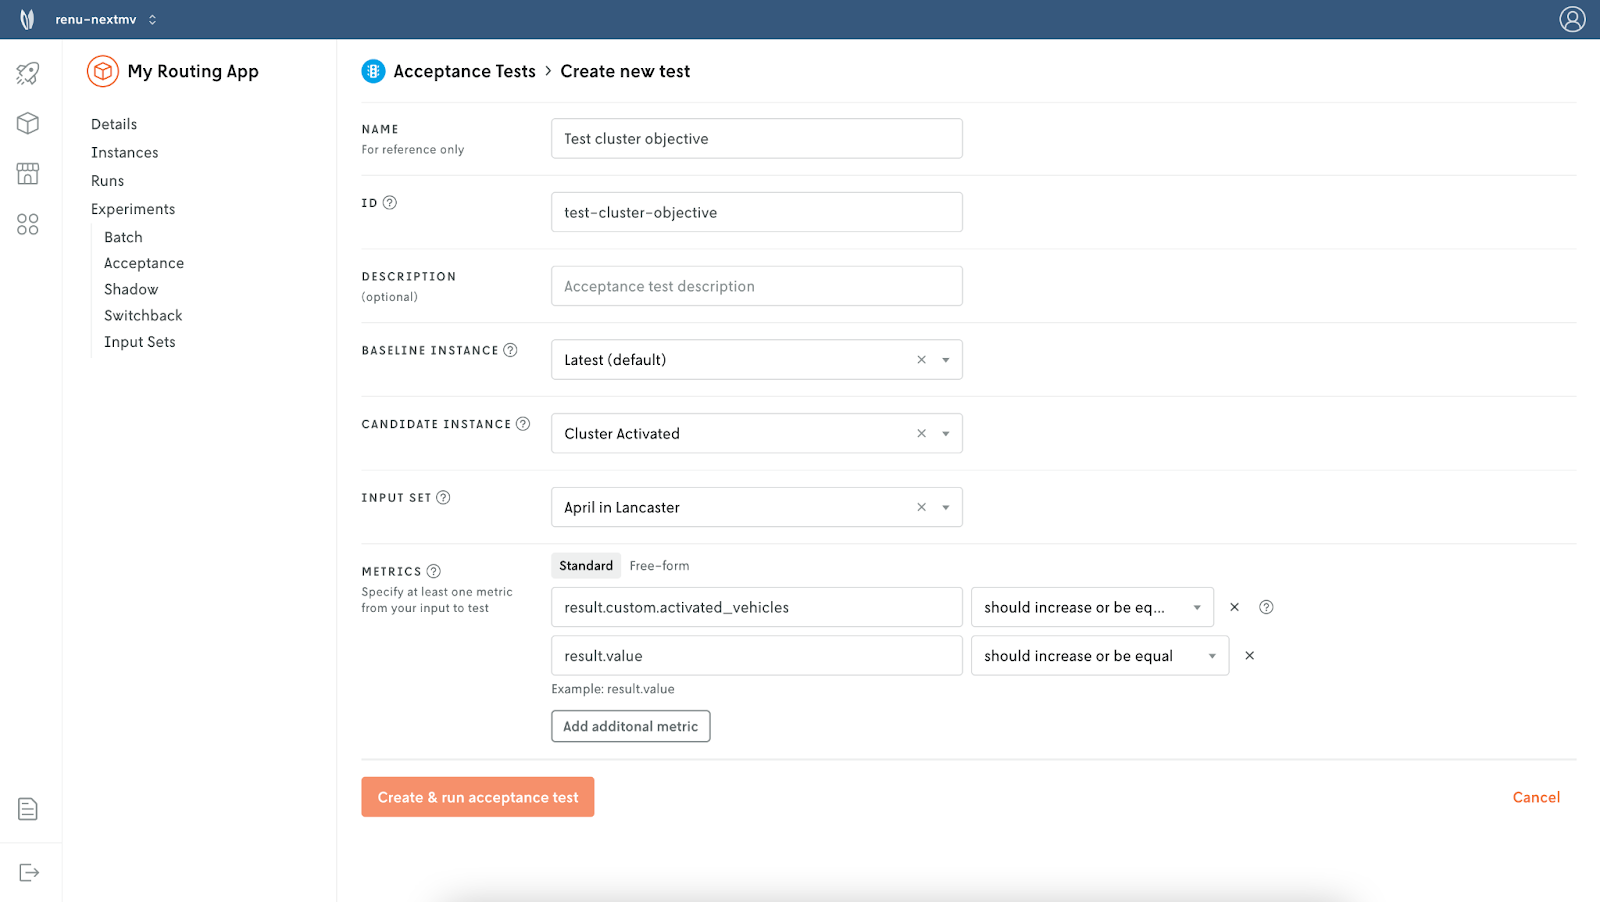
Create an acceptance test
We’ll use an acceptance test to see if the new instance of the model delivers the expected results: more activated drivers.
- Click on ‘Acceptance’ and then ‘New acceptance test’
- Give it a name (e.g., Test cluster objective)
- Baseline: Latest (default)
- Candidate: Cluster Activated
- Select the input set you just created
- Define metricssome text
- result.custom.activated_vehicles : should increase or be equal
- result.value : should increase or be equal
- Click ‘Create & run acceptance test’
The results of the acceptance test show the metric changes that we expected, and are indicated with a green checkmark. We can see that the ‘cluster-activated’ instance uses a mean of 34 vehicles (or drivers) compared to the original model that uses a mean of 4.3 vehicles.
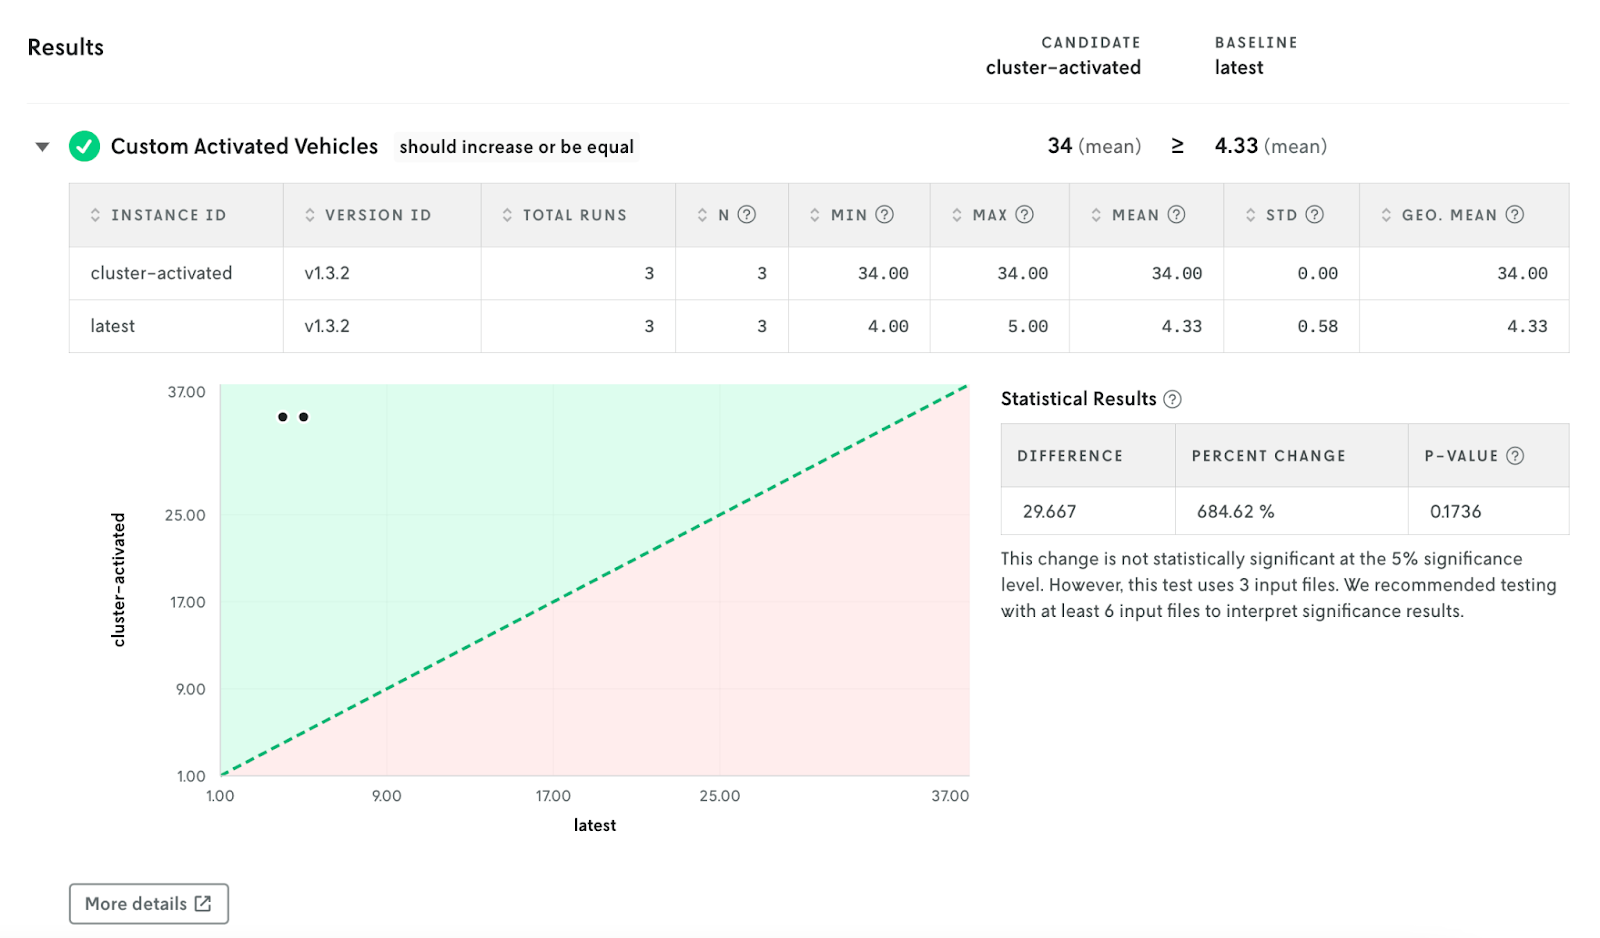
We also saw that the solution value increases (which we expected) since we introduced clustered routes as the objective.
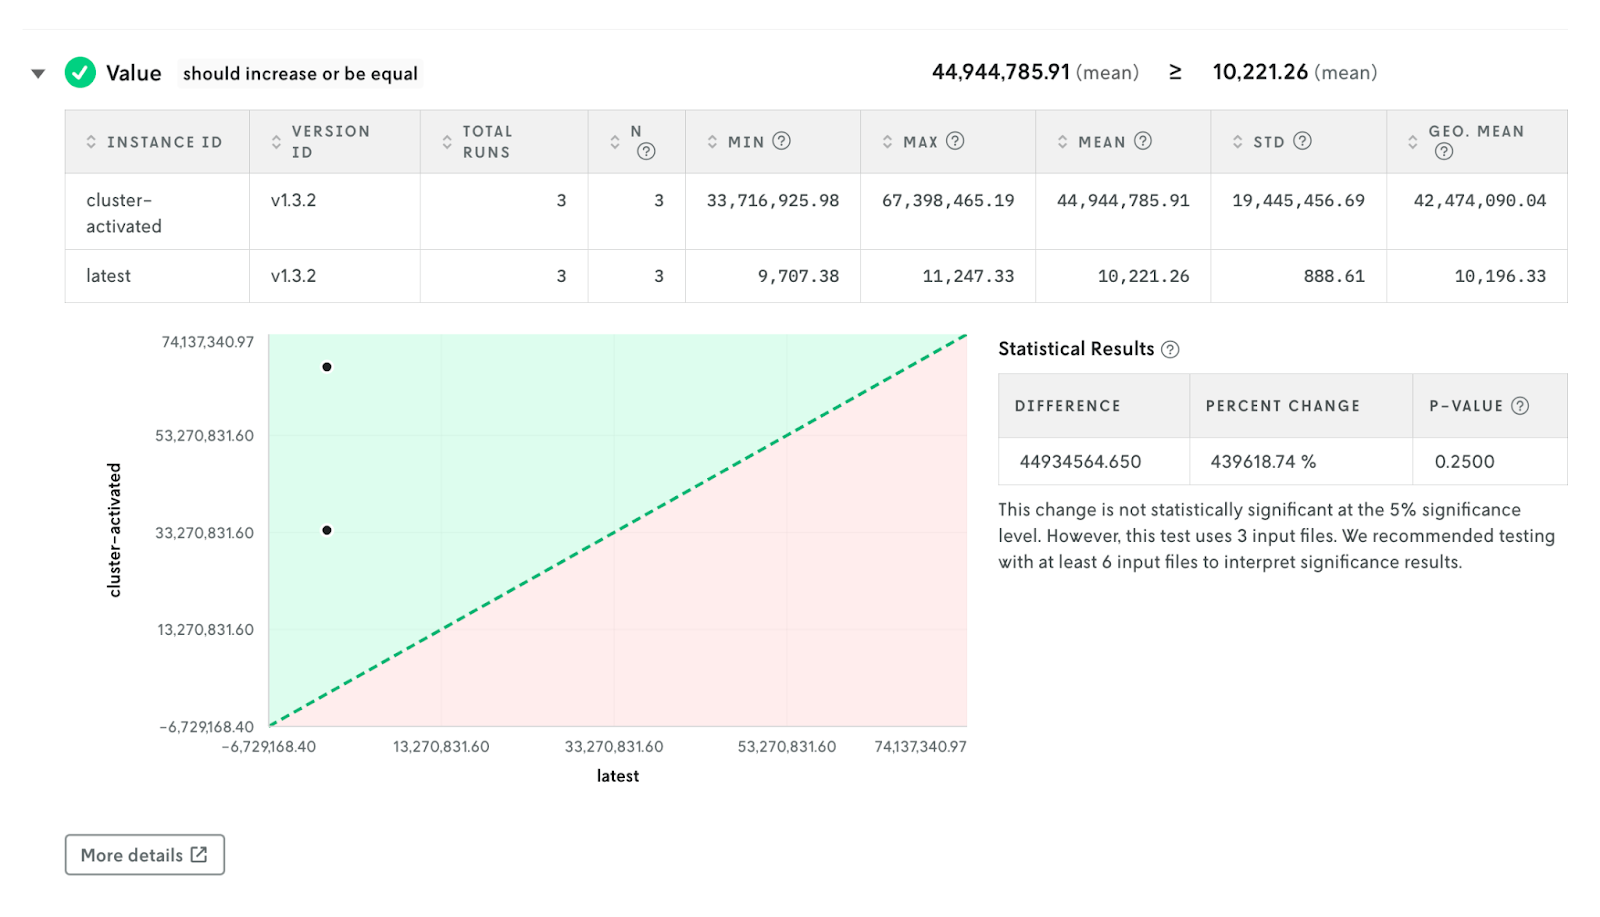
So far it seems our model changes are producing more favorable solutions given our business requirements. From here, we would continue to tune our model updates and test changes before promoting a new model to production.
Try it with your data
Create a free Nextmv account to run these logistics models with your own data and make updates with confidence. Start with prebuilt apps and then customize them using modeling tools and solvers such as OR-Tools, Gurobi, HiGHS, AMPL, and Pyomo.
Have questions? Let’s chat! Hop into our forum or reach out to us directly.


.png)
.png)

